Project Description
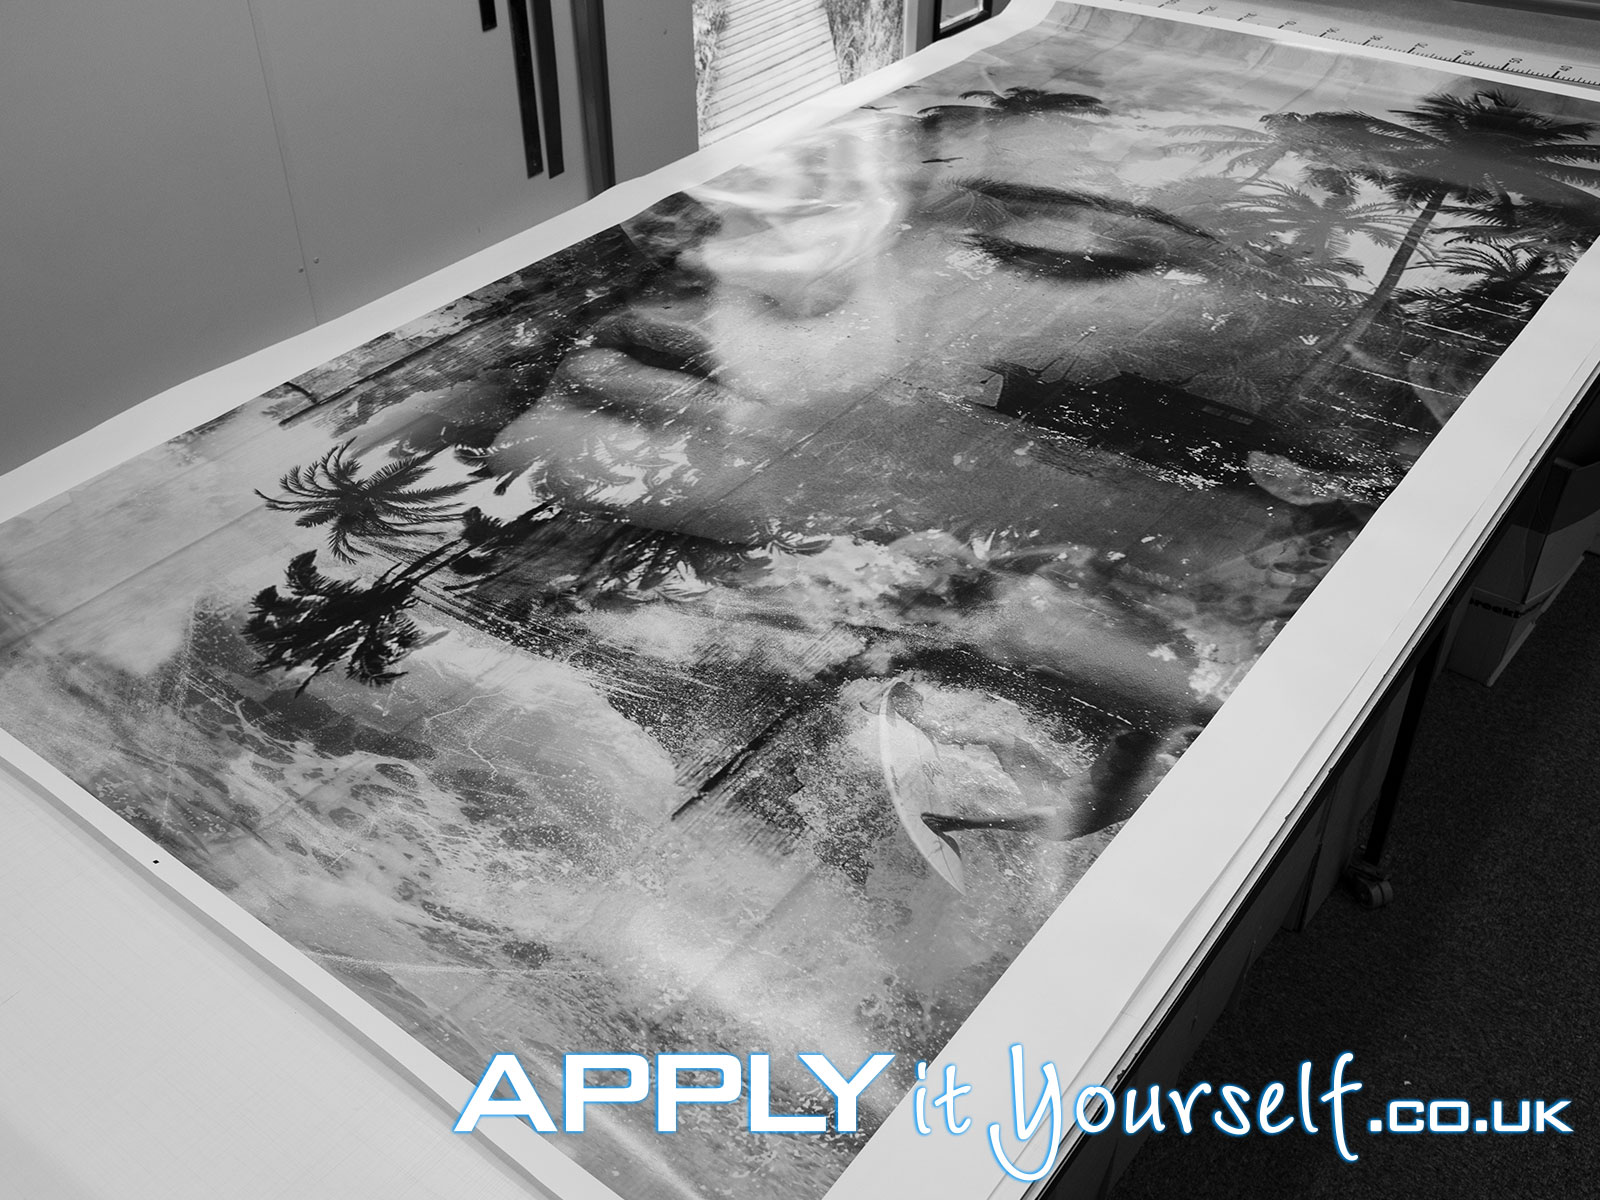
window stickers, branding, black-and-white
Window stickers, branding, black-and-white
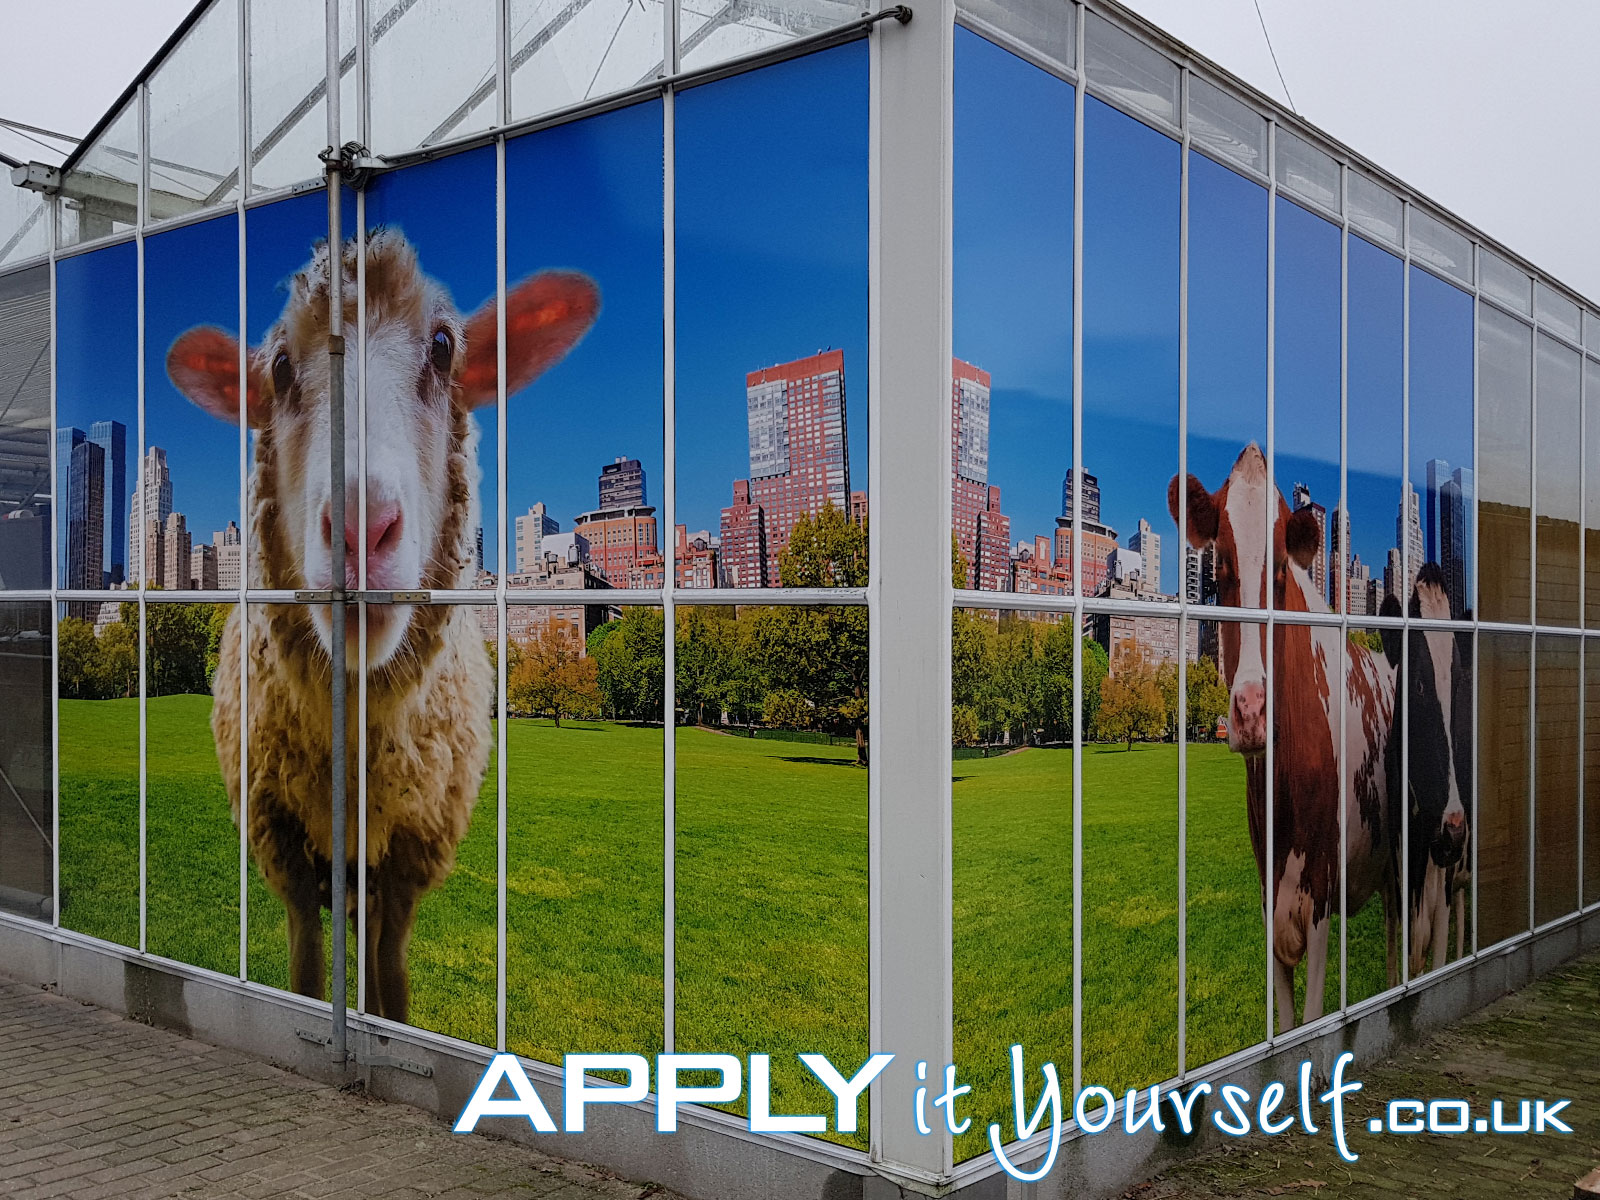
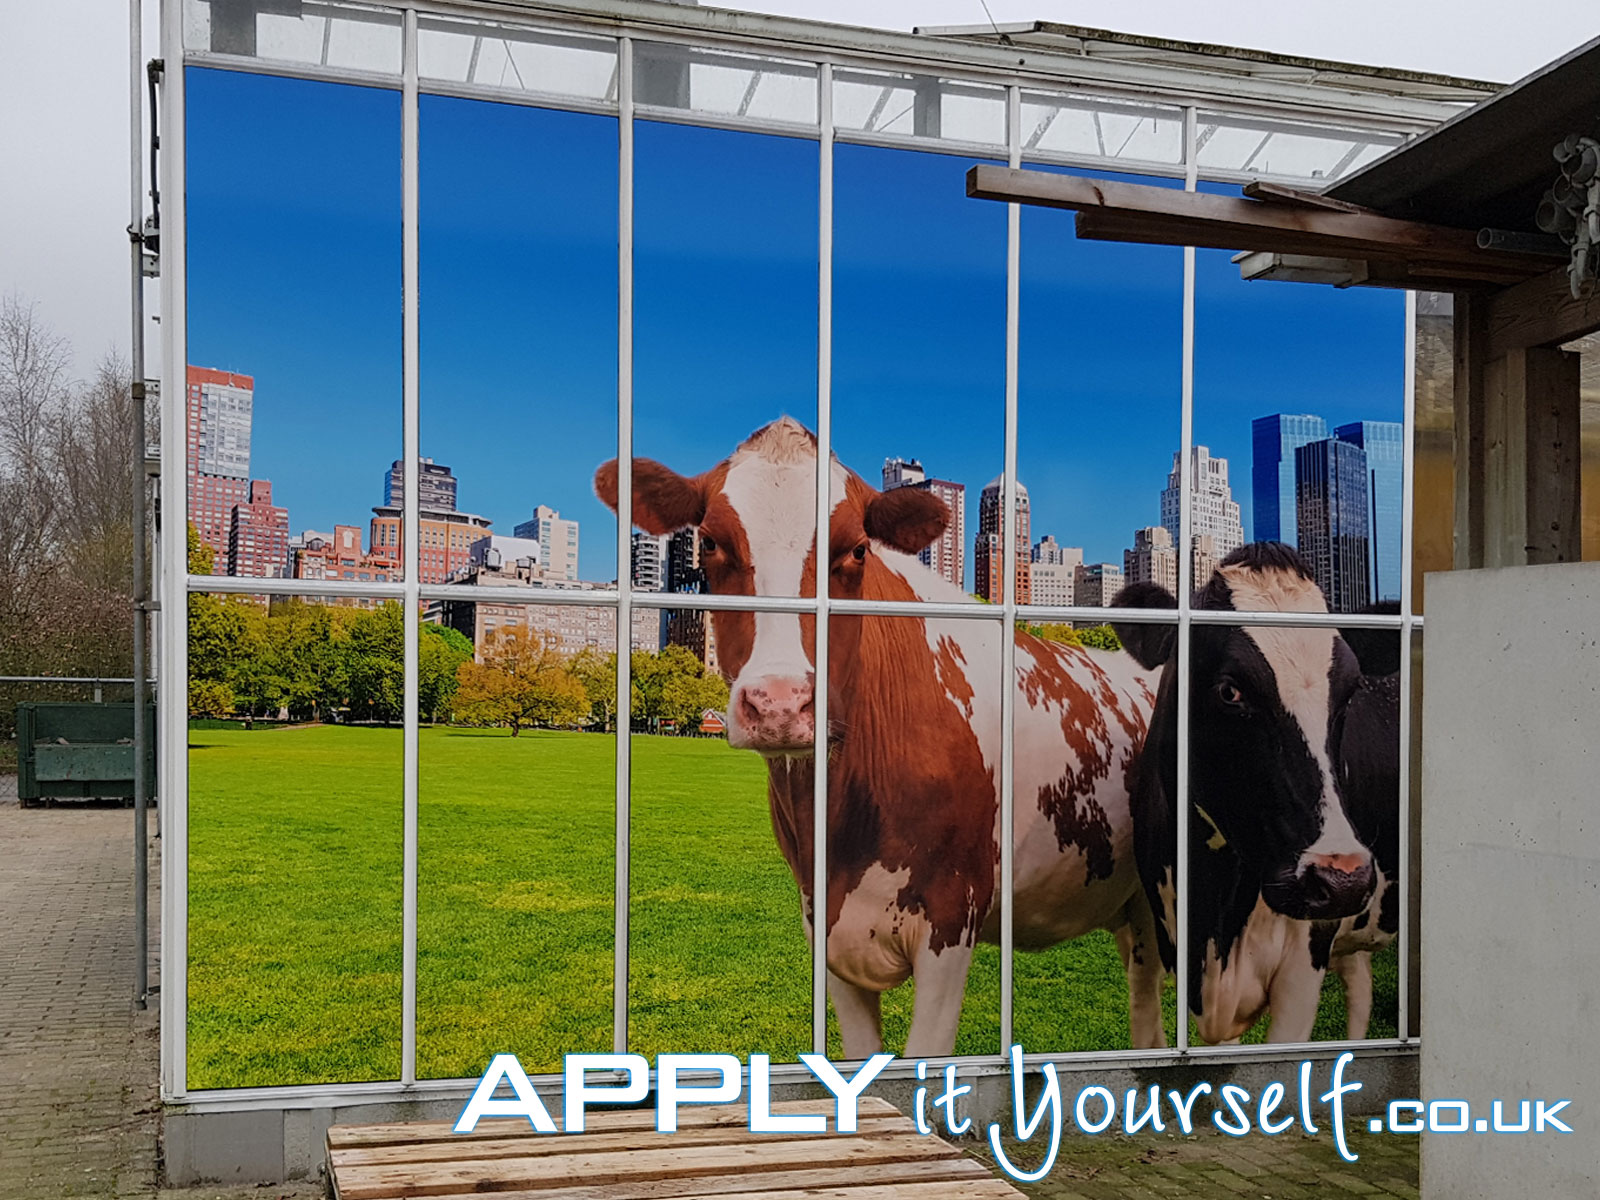
Custom window stickers with your own unique design. You design it yourself, quick and easy with our online designer. If you are looking for cut-to-shape window stickers (i.e., non-rectangular window stickers), contact us directly by email. We can supply you with both rectangular and cut-to-shape reverse window stickers.
Our made to measure window sticker solutions are made of high quality vinyl and will arrive pre-assembled in a sturdy box. Ready for application, no additional work is required.
The window stickers are weather and water resistant. The material itself blocks light (the material itself is largely opaque). This material blocks about 90% of incoming light. Thus this window film can be used to reduce heat and glare from the sun inside buildings and vehicles. In addition, it provides privacy. Window stickers are generally applied on the outside of the window/building. The back of the material is white/grey. Only apply window stickers on a flat and smooth glass surfaces.
We ship worldwide. Shipment will occur within 2 to 5 workdays after we receive your payment. You will receive an automated email with a track and trace code to follow your order.
Designing window stickers
Make your window sticker design 1:1. Use millimeters as the measurement unit.
Measure the size of the window glass. We advise you to subtract both 10 mm from the length and 10 mm from the height of this measurement (if you intend to cover the entire window). For a good and easy fit of your own unique window sticker.
For cut-to-shape. Everything, that needs to be cut, need to consist of vectors (ideally). Nothing smaller than 3mm. Lines need at least a width of 3mm. A dot (the smallest possible object) need to be at least 3×3 mm. For images/photos we advise a minimum resolution of 3×3 pixels per square millimeter (75 dpi). Or 3000×3000 pixels per square meter (1000×1000 mm). JPG/PNG files with high resolution, low compression.
Applying window stickers
For instructions and videos see our installation webpage. Please read the general instructions first. Subsequently the product specific instructions and after these watch the instruction videos.
Make sure to not apply window stickers in direct sunlight, make sure the temperature of the window sticker, the window itself and the surrounding air, is -ideally- around 15 to 18 degrees Celsius.
First, clean the window thoroughly. Remove paint, grease and other dirt (with a glass scraper). If any is left behind, it will always be visible! Also clean the surrounding area, like the window frame itself. If you are applying near the ceiling and/or the ground make sure they are also clean. Also be wear of flying insects. Use the free supplied squeegee and card over the application-tape/transfer-tape on the front of the window sticker to further increase the binding between the two. Use a flat surface, like a sturdy table.
Remove the backing paper. Carefully. When the window sticker contains cut-outs/letters/elements, be very careful when removing the backing paper, as to not tear the window sticker itself, when parts of the window sticker remain stuck to the backing paper. Take your time, most mistakes occur here!


