How to apply One-way vision window film
On this page we explain how to apply your new custom one-way vision window film (i.e., perforated window film).
Below you find instructions on how to apply your custom one-way vision window films. No water is needed.
- You apply the one-way vision window film to the front of the glass (on the outside of the window).
- Make sure to not apply your bespoke one-way vision window film in direct sunlight, make sure the temperature of the one-way vision window film, the window itself and the surrounding air is -ideally- around 12 to 18 degrees Celsius. When the temperature is above 18 degrees, we advise you to apply the window film during the early mornings or after sundown (during a time-period with the lowest temperature).
- Read the instructions supplied with your custom perforated window film. Always keep your window film flat so that is does not bend/fold.
- Clean the window and window frame thoroughly. Remove paint, grease and other dirt. This is especially important when the one-way vision window vinyl is applied outside, due to the holes in the material. Otherwise you will get issues.
- Also clean the surrounding area, like the window frame itself. If you are applying near the ceiling and/or the ground make sure they are also clean. Also be wear of flying insects.
- Use the supplied squeegee and card over the application-tape on the front of the window film to further increase the binding between the two. Use a flat surface, like a table.
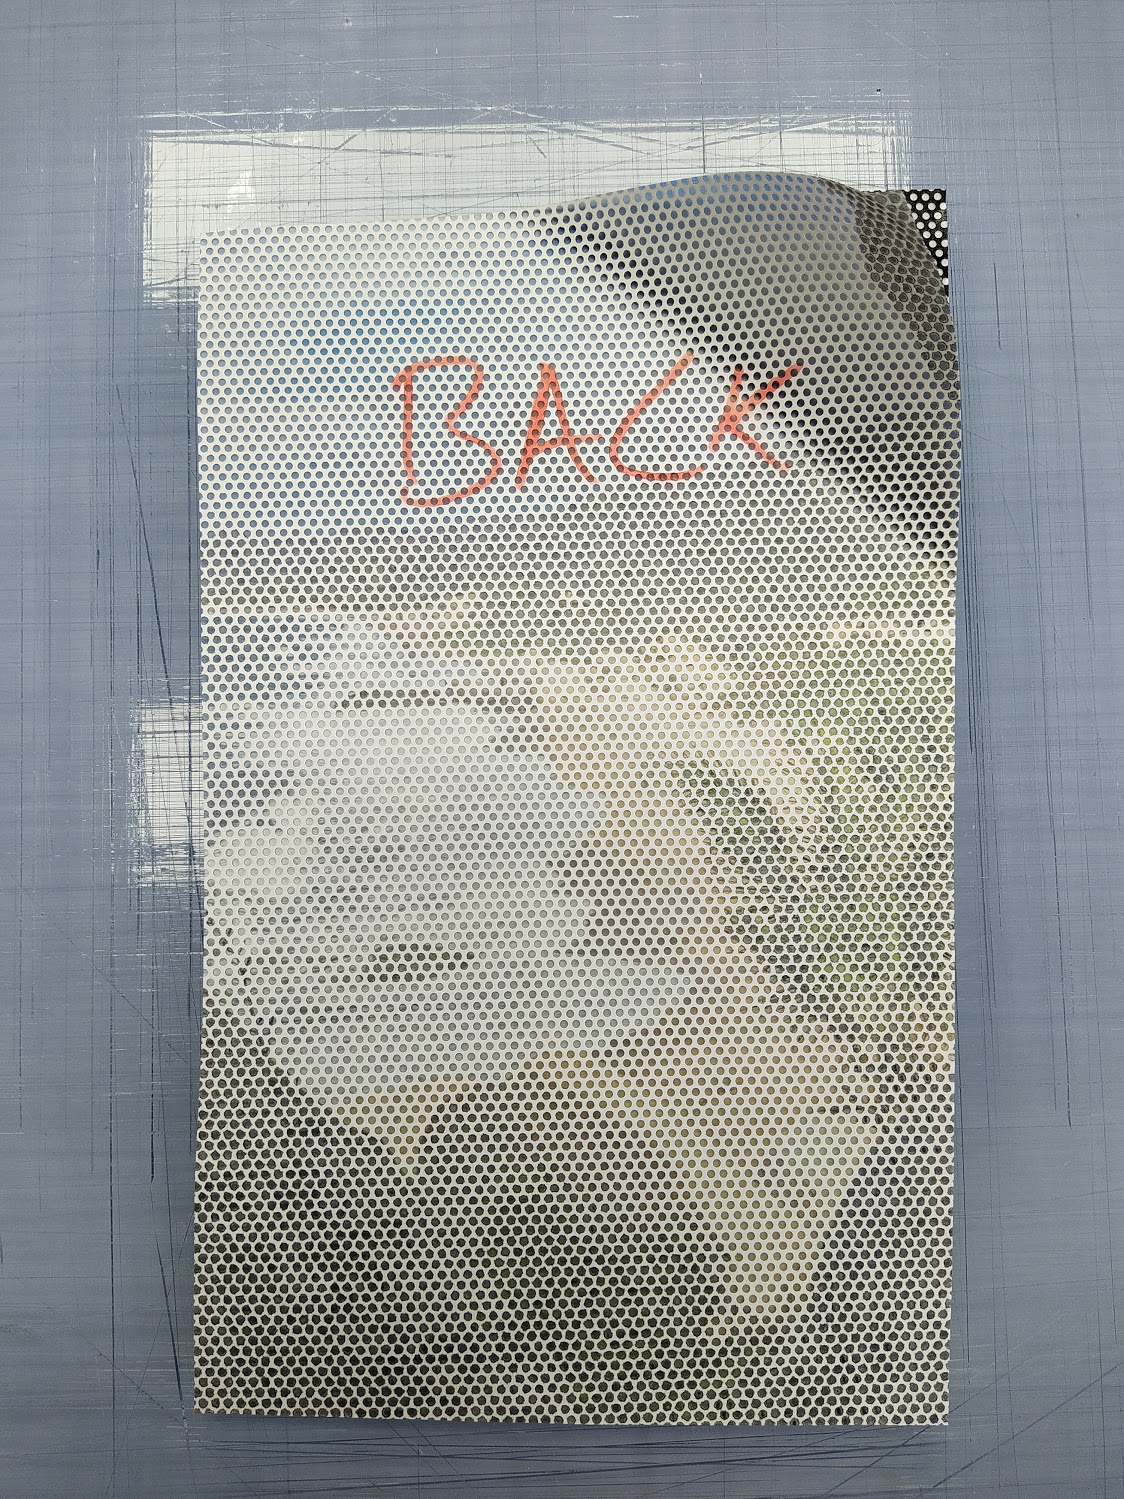
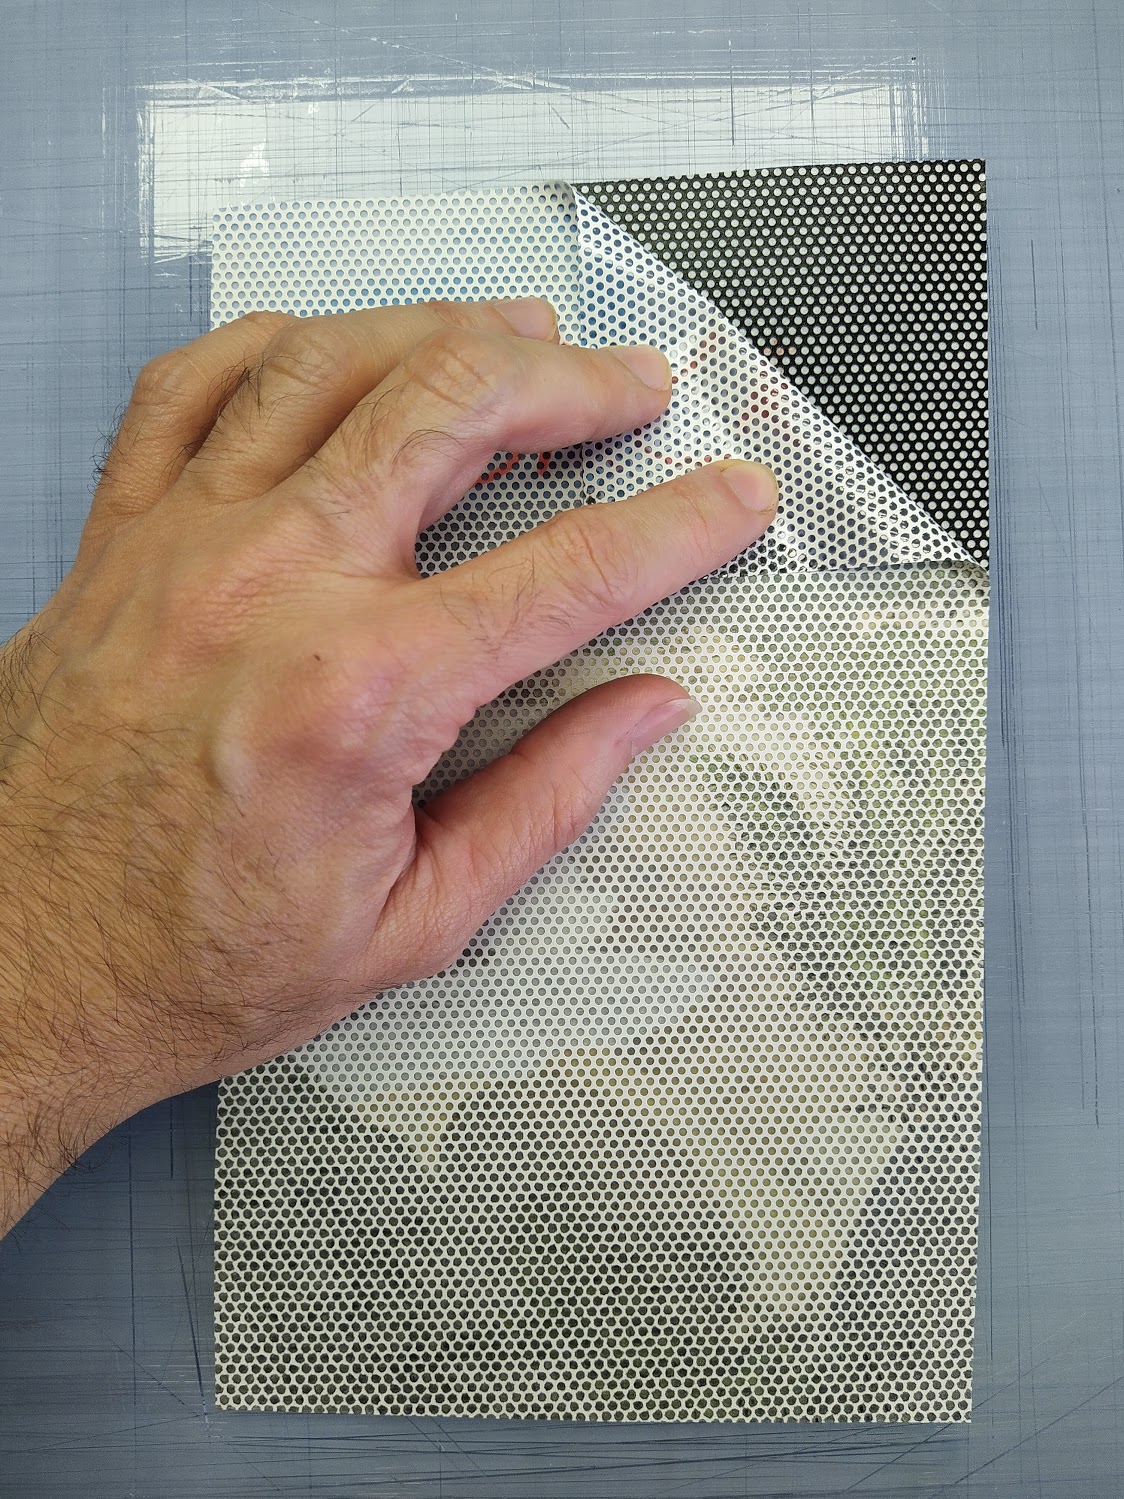
- Remove the backing paper. Carefully. The backing paper of one-way vision window film consists of two layers one transparent layer and one white layer with holes.
- The front of the one-way vision window film contains the “honeycomb” structure with your print/design/photo on it. On top of the print is the whitish/yellowish transfer tape (which you only remove after installation. The back of the one-way vision window film contains the white “honeycomb” structure. This is the backing paper which you need to remove to expose the black adhesive layer.

- Apply the perforated window film with the application-tape to the window and position the window film at the preferred location.
- Use your supplied free squeegee. Start in the middle/centre of the window film and move horizontal with overlapping movements towards the edge of the window film. During which you hold the window film a couple centimetres (2 inches) above the window/mirror/surface itself.
- Allow the adhesive enough time to stick to the window. So that removing the application tape does not lift the one-way vision window vinyl from the surface/window/mirror. Remove the application tape after a couple of hours, 6 to 12 hours should be enough.
- If, when removing the application tape, you lift the one-way vision window vinyl from the window glass. Wait 24 to 48 hours before removing the application tape.
- The one-way vision window vinyl should be very easy to remove for the first two years after application. When the material is warm (apply heat with a heat gun) it is easier to remove and will leave less adhesive/glue behind.
Below you will find the instruction video for applying perforated printed frosted window film (Two-way vision window film). One-way vision window film is applied similarly to the two-way vision window film.